
Introduction
Understanding feeding bees protocols is one of the most vital skills a beekeeper must master to ensure colony survival and productivity. The romantic notion of bees collecting all their own food is often true, but in the face of modern agricultural practices, variable weather, and increasing climate change, beekeepers frequently need to intervene. Strategic feeding is not a failure of management; it is a critical component of successful hive stewardship, ensuring the colony has the necessary resources to survive the winter, rebound in the spring, and withstand unexpected periods of nectar dearth. Properly feeding bees is more than just a chore; it is a science that prevents starvation during unexpected weather changes.
This comprehensive guide is designed to empower both novice and experienced beekeepers with precise, practical knowledge. We will explore the different types of supplemental food—specifically sugar syrup and pollen patties—the critical timing for their application, and the best equipment to use to deliver nutrition effectively without stressing the colony.

Ready to Start Beekeeping?
Get the Complete Beginner’s Essentials Kit – including a bee suit, smoker, and tools. Everything you need for your first hive!
View Starter Kit on Amazon →Why Feeding Bees is Critical for Colony Survival (The Core Rationale)
A healthy colony is one that is self-sufficient. However, there are three primary scenarios where beekeeper intervention is not just recommended, but often essential for the survival and growth of the hive. Knowing the why helps inform the what and when of your feeding strategy.
1. Feeding Bees to Stimulate Spring Buildup
After a long winter, a colony needs to rapidly expand its population to capitalize on the early spring nectar flow. This period is called spring buildup.
- The Goal: The primary objective of spring feeding is not necessarily to provide food, but to stimulate the Queen Bee to increase her rate of egg-laying. Bees perceive the influx of liquid food (syrup) as a sign of an incoming nectar flow, triggering the Queen to prepare for the population boom needed to harvest it.
- The Medium: Thin, 1:1 sugar syrup (one part sugar to one part water by volume) is the ideal choice for stimulation, as it mimics natural nectar content.
- Timing: Start feeding aggressively 4–6 weeks before your main nectar flow is expected to begin.
2. Winter Preparation (Crucial Storage)
This is the most critical feeding period. If a colony enters winter without sufficient capped honey stores, it will starve. This usually happens in late fall after the honey harvest.
- The Goal: To provide the bees with a dense carbohydrate source that they can easily convert, cure, and cap into winter stores. This is a survival measure.
- The Medium: Thick, 2:1 sugar syrup (two parts sugar to one part water by volume) is preferred. The higher sugar concentration means less water for the bees to evaporate, saving them considerable energy and time.
- Timing: Begin feeding immediately after the final honey harvest (typically late summer/early fall) and continue until the bees have capped the required amount of stores or until temperatures make feeding impractical (usually when nighttime temperatures drop below 50°F or 10°C).
3. Nectar Dearth (Bridging the Gap)
A nectar dearth is an unexpected lack of natural forage, often occurring in the middle of summer (e.g., July or August) due to drought or weather patterns.
- The Goal: To prevent the colony from starving and to stop the bees from raiding weaker nearby hives (robbing).
- The Medium: 1:1 sugar syrup, along with pollen patties if a lack of protein is also evident.
- Timing: Feed only when inspection shows stores are dangerously low and no natural nectar sources are available.
Proper nutrition is the foundation of a thriving apiary, especially when you are just starting out. If you are a new beekeeper, make sure to pair your feeding schedule with our [Beginners Guide to Beekeeping: First 30 Days in Your Apiary] to ensure your colony survives its most critical first month.
Feeding Bees Sugar Syrup: The Liquid Fuel (The Liquid Fuel)
Sugar syrup is the primary tool for strategic carbohydrate feeding. Its simplicity is deceptive; small mistakes in preparation can lead to colony health issues.
The Golden Rule of Ratios: 1:1 vs. 2:1
Choosing the correct concentration is essential for achieving your desired outcome.
How to Make Sugar Syrup (Step-by-Step)
The only acceptable sugar for feeding honey bees is refined white granulated cane sugar. Never use brown sugar, molasses, raw sugar, confectioner’s sugar, or sugar substitutes. These contain compounds and impurities that bees cannot digest, leading to digestive stress and dysentery, especially in winter.
- Measure Ingredients: Accurately measure your water and sugar according to the desired ratio (1:1 or 2:1).
- Heat Water: Pour the required amount of water into a large pot or bucket. Heat the water until it is hot to the touch, but do not boil. Boiling water causes the sugar to crystallize back into an unusable form, which is detrimental to bee health.
- Dissolve Sugar: Slowly add the sugar to the hot water while stirring vigorously. Continue stirring until the sugar is completely dissolved and the solution is clear.
- Cool Down: Allow the syrup to cool completely to ambient temperature before placing it into the feeders. Never feed bees hot syrup.
- Optional Additives (Use with Caution): Some beekeepers add a small amount of commercially prepared honey bee nutritional supplement (such as essential oils or amino acids). However, never add actual honey from an unknown source, as this risks spreading American Foulbrood (AFB) spores to your hive.

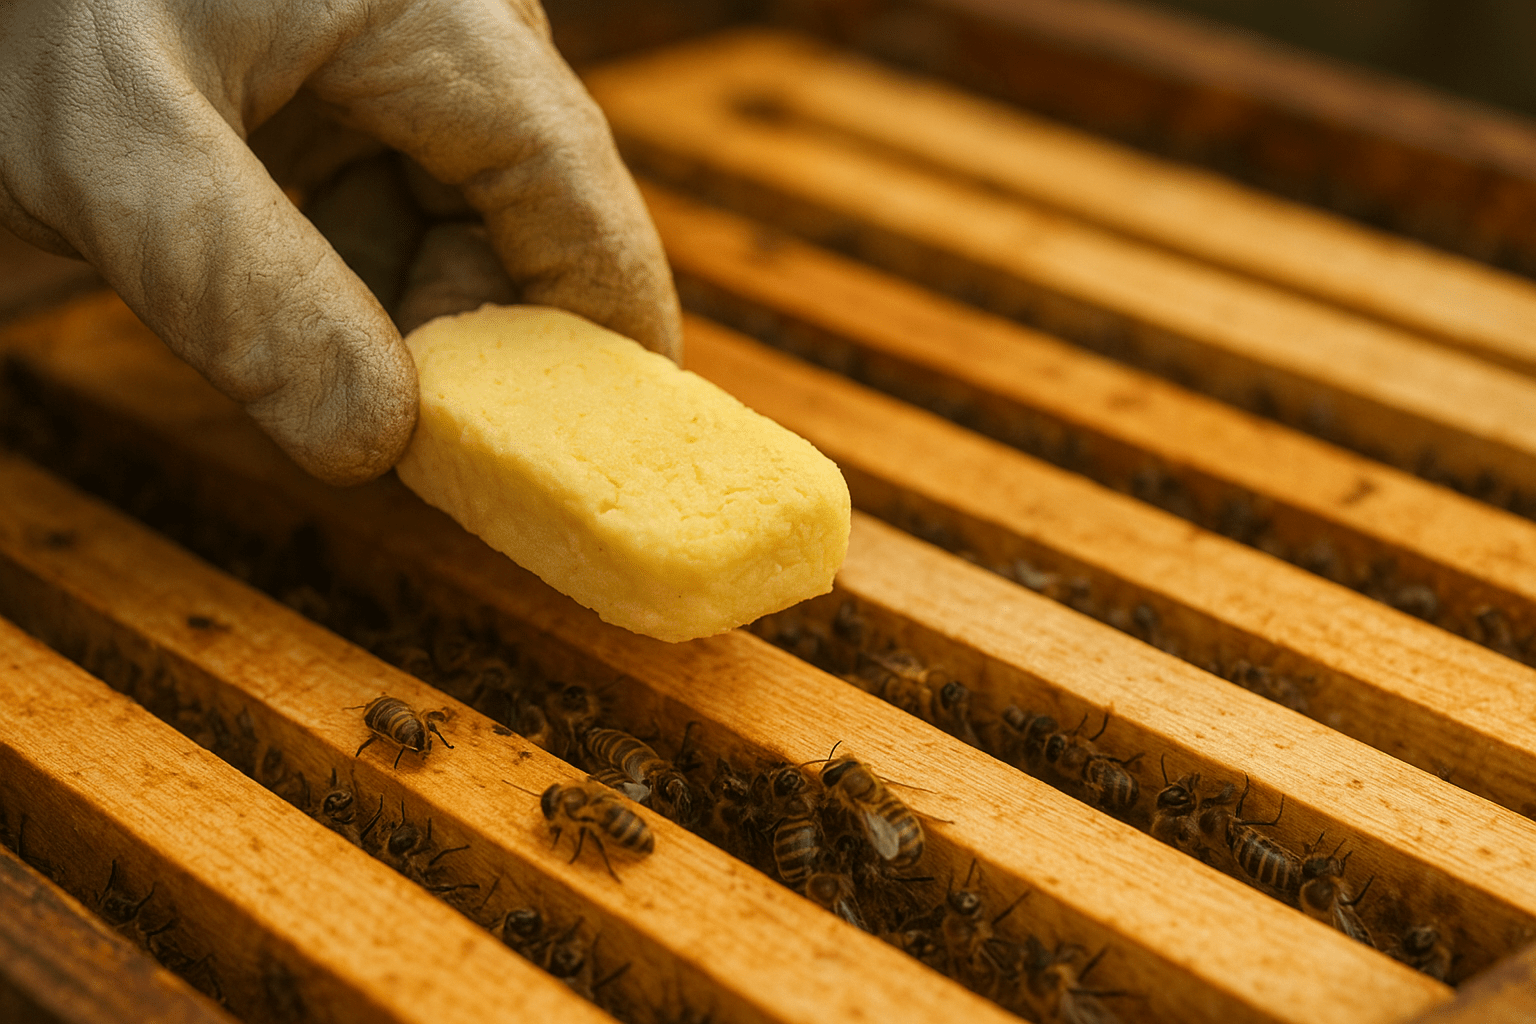
Feeding Bees Pollen Patties: The Protein Source (The Protein Source)
While sugar syrup provides carbohydrates (energy), pollen patties supply protein, fats, and vitamins—the essential nutrients required for the nurse bees to produce royal jelly and rear brood.
When to Use Pollen Patties
Pollen patties are used to address a specific need: a lack of natural pollen, which limits brood production.
- Stimulating Brood Rearing: Patties are crucial in late winter/early spring when temperatures are too low for bees to fly and collect natural pollen, but the Queen needs to start laying aggressively to prepare for the honey flow.
- Protein Dearth: They can also be used during summer nectar dearths if the colony shows signs of slowed brood production due to protein deficiency.

Homemade vs. Commercial Patties
Application: Place the pollen patty directly on the top bars of the bottom hive body, ensuring it is positioned right above the brood nest where the bees are active. A small piece of the wrapper can be left on top to prevent the patty from drying out too quickly.
As the temperatures drop, shifting your feeding strategy becomes a matter of life and death for the hive. To learn how to transition from syrup to solid winter feeds, check out our comprehensive guide on [Winter Hive Care: Preparing Bees for Cold Weather]
The Best Equipment for Feeding Bees Safely (Equipment Review)
The method of delivery is nearly as important as the food itself. An improperly chosen or maintained feeder can result in drowning bees, spoilage, or attracting pests. This section covers the most popular options.
1. Hive-Top Feeders (The Professional Choice)
- Description: These feeders replace an inner cover and sit on top of the uppermost box. They consist of a large reservoir (often holding 3–5 gallons) accessed by the bees through small internal wells or chimneys, minimizing drowning risk.
- Pros: Massive capacity; allows feeding without opening the hive, minimizing disturbance; easy to monitor the syrup level.
- Cons: Requires an extra box height, making the hive heavier; can create moisture issues if not properly ventilated.
2. Frame Feeders (Division Board)
- Description: These feeders are plastic or wood containers shaped like a deep frame, replacing one or two frames inside the hive body.
- Pros: Inside the hive, keeping the syrup warm and safe from robbers; takes up no extra vertical space.
- Cons: Limited capacity (1–2 gallons); requires opening the hive to refill, increasing disturbance; risk of bees drowning if flotation devices (e.g., wood floats or roughness) are not present inside.

Rapid Entrance Bee Feeder
3. Entrance Feeders (The Beginner Option – Use with Caution)
- Description: A simple glass jar or plastic container inverted over a perforated base placed at the hive entrance.
- Pros: Very easy for beginners to use and monitor; no hive disturbance required.
- Cons: Not recommended for large-scale feeding or during dearth. They are highly prone to attracting robbers (bees from other hives) and wasps, leading to hive conflicts. Should only be used for small, temporary feeding.
Common Feeding Mistakes Every Beekeeper Must Avoid
The best intentions can sometimes lead to poor outcomes in beekeeping. When you decide on feeding bees, a single misstep can compromise colony health, attract pests, or even contaminate your honey harvest. Avoid these common blunders to ensure your feeding efforts are successful.
Mistake 1: Feeding During the Main Nectar Flow
This is perhaps the most critical mistake to avoid, especially for beekeepers who intend to harvest honey for human consumption.
- The Risk: Honey Contamination. If you feed sugar syrup while the bees are actively collecting nectar, they will often mix the syrup with the natural nectar and store the sugar syrup in the honey supers. This contaminates your raw honey, making it unfit for sale as “pure honey.”
- The Rule: Always stop feeding sugar syrup at least two weeks before the main nectar flow begins. Once the honey supers are on the hive, all syrup feeders must be removed.
Mistake 2: Using the Wrong Sugar or Water
As previously stated, only refined white cane sugar should be used. Using inappropriate substitutes is a direct threat to the colony, particularly during the winter cluster.
- The Risk: Digestive Problems. Brown sugar, molasses, fruit juices, or powdered (confectioner’s) sugar contain plant gums, minerals, and starch that bees cannot fully digest. This leads to an excessive buildup of waste in the bees’ digestive tracts, causing severe dysentery within the hive—a condition that can quickly kill a colony clustered for winter.
- The Rule: Use only plain, clean water (distilled or filtered, if your tap water is heavily chlorinated) and pure white granulated cane sugar.
Related Articles
Mistake 3: Allowing Syrup to Ferment or Spoil
Sugar syrup, especially the thin 1:1 ratio, can quickly ferment in warm weather, often within 3–5 days. Fermented syrup is toxic to bees and can encourage mold growth, which bees will actively avoid.
- The Risk: Sickness and Waste. Bees will not consume spoiled syrup, or if they do, it will cause digestive issues. This leaves a crucial resource sitting unused.
- The Rule: Only mix enough syrup that your colony can consume within one week. If you find leftover syrup that smells sour or has a cloudy layer, dispose of it immediately and clean the feeder thoroughly before refilling.
Mistake 4: Feeding in the Open (Attracting Robbers and Pests)
Open feeding is when you place a large container of sugar syrup out in the open apiary for all bees to access. While it seems convenient, it is extremely dangerous.
- The Risk: Robbing and Fighting. Open syrup attracts every bee, wasp, and yellow jacket from miles around, inciting intense robbing. Strong, healthy colonies will attack weaker colonies to steal their stores, leading to massive fights, colony loss, and the destruction of weaker hives.
- The Rule: All syrup and patties must be fed inside the hive (using internal feeders) or at the hive entrance. If using entrance feeders, monitor them closely and remove them immediately if you see signs of robbing activity (intense bee fighting and clustering around the entrance).
Emergency Feeding: When Disaster Strikes
Sometimes, despite your best planning, an unusually long cold snap, an extended summer drought, or a miscalculation of winter stores leaves a colony facing starvation. These are the times for emergency feeding, focused purely on survival. When disaster strikes, feeding bees dry sugar can provide an immediate lifeline to a colony on the brink of collapse.
The Candy Board / Fondant Method (Best for Winter)
The candy board, or hard sugar fondant, is the preferred emergency food source for colonies clustered in winter, as it provides solid food that does not require the bees to break cluster to cure water.
- What it Is: A mixture of finely milled sugar, a small amount of water, and sometimes a nutritional additive, cooked until it forms a hard, stable candy. It is usually poured into a shallow wooden rim.
- Application: Place the finished candy board (or a commercially bought sugar block/fondant) directly on top of the upper frames, immediately above the winter cluster. The bees consume the sugar directly, which gives them the necessary fuel to survive until spring.
The Dry Sugar Method (Quickest Survival Fix)
In a sudden winter emergency, placing dry white granulated sugar directly into the hive is the fastest method.
- What it Is: Simply pour dry white granulated cane sugar onto the inner cover or directly onto the top bars of the hive.
- Application: The bees will use the moisture created by their respiration and body heat to slowly dissolve the sugar, consuming it as a liquid fuel. This is messy and less efficient than fondant, but it can buy a starving colony valuable time when temperatures are too cold to feed syrup.
The Third Essential Resource: Water
When focusing on feeding bees sugar and pollen, beekeepers often overlook the third critical resource: clean water. Bees require water daily for several purposes, and if a clean source is unavailable, they may resort to drinking contaminated or chemically treated water or even robbing moisture from neighbors.
The Role of Water in the Hive
- Thermoregulation (Cooling): In hot weather, foraging bees collect water and bring it back to the hive. They spread thin films of water over the capped brood cells. House bees then fan this water, which evaporates and acts like an air conditioner, keeping the hive temperature stable (around 95°F or 35°C).
- Dilution: Honey and crystallized sugar are too dense for young larvae. Nurse bees use water to dilute stored honey or pollen patties before feeding it to the brood.
Creating a Safe Bee Watering Station
Bees are attracted to moist, dirty, or brackish water because they can land securely on the edges. To prevent them from congregating at swimming pools, pet bowls, or taking water from neighbors, you must provide a dedicated, safe source.
- Use a Shallow Dish: Use a shallow ceramic dish or plant saucer.
- Provide Landing Pads: Fill the dish with smooth stones, river pebbles, or marbles (as illustrated in your previous request’s prompt). These surfaces allow the bees to land safely and drink without falling in and drowning.
- Location: Place the watering station close to the apiary but in a sunny spot.
- Maintenance: Ensure the dish is never dry and change the water daily to prevent mosquito breeding.
Integrating Feeding with Seasonal Hive Management
Successful beekeeping requires a yearly calendar. Here is a brief summary of how feeding bees fits into your seasonal routine:
| Season | Primary Goal | Feeding Medium | Action |
|---|---|---|---|
| Spring (March–May) | Population Buildup | 1:1 Sugar Syrup & Pollen Patties | Feed 4-6 weeks before flow. Use patties if natural pollen is scarce. |
| Summer (June–Aug) | Honey Production | Stop all feeding | STOP FEEDING! Remove all feeders when honey supers are on. |
| Fall (Sept–Oct) | Winter Preparation | 2:1 Sugar Syrup (Thick) | Feed heavily after harvest to refill winter stores. Stop when temp drops below 50°F (10°C). |
| Winter (Nov–Feb) | Survival | Fondant or Candy Boards | Do not feed syrup. Only use solid food in emergencies if stores run out. |
🐝 Frequently Asked Questions About Feeding Bees
1. What is the absolute best sugar for feeding bees?
The most reliable source for feeding bees is pure, white granulated cane sugar. You must avoid brown sugar, molasses, or organic raw sugars because they contain solids that can cause fatal dysentery in your colony during winter.
2. At what temperature should I stop feeding bees liquid syrup?
You should generally stop feeding bees liquid sugar syrup when nighttime temperatures consistently drop below 50°F (10°C). Below this point, bees cannot easily evaporate the excess moisture, making solid fondant a better choice for winter survival.
3. Can feeding bees too much in the spring cause swarming?
Yes, aggressive feeding bees in early spring can lead to brood nest congestion. If the queen runs out of space to lay because cells are full of syrup, the colony may trigger a swarm impulse. Always monitor space when supplemental feeding.
4. Is feeding bees pollen patties necessary every year?
Strategic feeding bees protein via pollen patties is essential if your local environment has a pollen dearth or if you want to jumpstart brood production 4-6 weeks before the first natural bloom.
5. Does feeding bees affect the quality of my honey harvest?
To ensure pure honey, you must stop feeding bees at least two weeks before the main nectar flow begins. Never harvest honey from supers that were on the hive while sugar syrup was being fed.
Essential for Feeding Bees!
Don’t let your colony starve during the next dearth. This high-protein pollen substitute is what we use at Buzz and Hive to guarantee spring success.
Conclusion: A Skill that Ensures Colony Success
Mastering the protocols for feeding bees is not just about giving them sugar; it’s about strategic hive management that ensures survival and encourages growth. It bridges the gaps left by a changing environment, providing crucial nutrients when natural forage is scarce. Refining your strategy for feeding bees will transform you from a reactive observer into a proactive hive manager.
Whether you are providing a 1:1 boost in the spring or packing on 2:1 syrup for winter, understanding exactly when and how to handle feeding bees is the defining difference between a struggling colony and a thriving apiary. By avoiding common mistakes and investing in reliable equipment, you ensure your Buzz and Hive colonies are ready to face any season. Make feeding bees a central and thoughtful part of your routine.
🐝 A Century of Beekeeping Wisdom
"Beekeeping is more than a hobby for me—it’s a family legacy. From my great-grandfather to my brother and me, we’ve managed our apiaries in the rugged landscapes of Herzegovina for four generations. Today, we care for over 300 hives, blending century-old traditions with modern techniques. Every tip I share comes directly from our hives to your screen."

